
Every year my husband and I throw an all out Oscar Awards watch party. Last year it was red carpet/black tie formal. This year, we went with a costume party. All of our friends came dressed as their favorite character from any Oscar nominated movie, past or present. James and I decided to pay homage the oft-under appreciated Oscar Award winner for Best Picture in 1976 – ‘Rocky’.


 Pulling together our costumes for this beloved movie couple was surprisingly easy. We had all the clothes we needed in our own closets. The only thing I was missing was Adrian’s iconic red beret.
Big, fuzzy and felted , This hat is 70s chic and timelessly modern. Here’s the pattern for how I made it.

Yarn: 1 skein of worsted weight yarn – 100% wool. I used Paton’s classic wool.
Needles: 12-16″ Size 8 circular needles and set of size 8 Double pointed Needles
Cast on 88 stitches.
Join to knit in the round and place a marker to mark the end of the row.
Knit in a 1×1 rib (k1, p1) until the brim measures 1 1/2″ long.
Next row: *K2, M1*, Repeat ** to the end of the row. (132 stitches)
Knit every row for 6″ (the hat is now 7.5″ from cast on)
Start decreasing, switching to double pointed needles when necessary.
Decrease Row 1 = *SSK, Knit 22, K2tog* Repeat ** until end of row
Decrease Row 2 (and all even numbered rows) = knit
Decrease Row 3 = *SSK, Knit 20, K2tog* Repeat ** until end of row
Decrease Row 5 = *SSK, Knit 18, K2tog* Repeat ** until end of row
Decrease Row 7 = *SSK, Knit 16, K2tog* Repeat ** until end of row
Decrease Row 9 = *SSK, Knit 14, K2tog* Repeat ** until end of row
Decrease Row 11 = *SSK, Knit 12, K2tog* Repeat ** until end of row
Decrease Row 13 = *SSK, Knit 10, K2tog* Repeat ** until end of row
Decrease Row 15 = *SSK, Knit 8, K2tog* Repeat ** until end of row
Decrease Row 17 = *SSK, Knit 6, K2tog* Repeat ** until end of row
Decrease Row 19 = *SSK, Knit 4, K2tog* Repeat ** until end of row
Decrease Row 21 = *SSK, Knit 2, K2tog* Repeat ** until end of row
Decrease Row 23 = *SSK, K2tog* Repeat ** until end of row
Decrease Row 24 = Knit
Decrease Row 25 = K2tog until 3 stitches remain.
Put the remaining 3 stitches on one needle and pull them through to the opposite (right side) of the hat.
Knit an i-cord for 3 inches and bind off leaving a 6 inch tail.
Use the tail to sew the i-cord into a loop on top of the beret.
Trim the edges and felt the hat on the warmest washing machine setting.
Pull out the beret immediately after felting and shape it to your head tucking the brim under so it rolls on itself. You’ll want to keep it shaped while it’s drying – at least 24 hours. My drying rack of choice is a tightly rolled towel on it’s end, but get creative – almost anything will do the trick. And now comes the hard part – waiting for it to dry enough to wear it!
‘cue Gotta Fly Now for the closing credits’
Costume or not, this hat – like Rocky, is sure to become a classic.


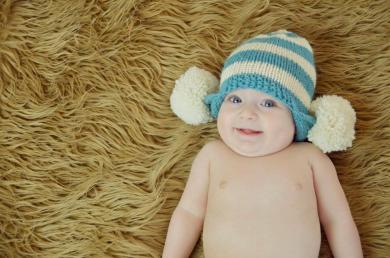
 A quick trip to Ravelry and I found the most awesome pattern by Sunshyne Leland – the Felted Baby Yoda Hat a fabulous pattern and it’s free! I knit mine with some old Lion Brand Wool (my favorite felting yarn) and followed Sunshyne’s instructions for starching the ears. I knit the coat while I was expecting and never planned to use it as a Jedi cloak, but it really completed the ensemble. It’s the Snug by Hinke, also free! knitted with Lion Brand Fisherman’s wool. I hadn’t sewn buttons on it yet so I used a wooden shawl pin to close it and bless her heart, the girl left her hat and coat on all evening.
 All in all, it was a fabulous first holiday, and I imagine, the last one that I’ll be able to dress my little girl up like a 900 year old alien instead of a princess or a fairy. She’ll probably groan at these pictures someday but I couldn’t be happier at how it all turned out. Cutest little alien I know.


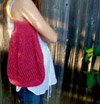 Beach Bum Bag
 Garter Snake Purse
 Head to Headband
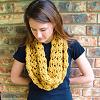 Holy Cowl!
 Holy Cuffs
 Organic Mushrom
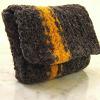 Racing Stripes
 Silk Bandana Scarf
 The Eco Hero
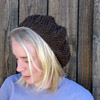 The Kiwi Slouch
 The Micro Scarf
 The Weekender