Maybe you’re one of those people who have already decked your halls, cut your own fresh tree, baked your gingerbread house from scratch, and crossed every last friend off your handmade gift list. If so, you can disregard the following 5 words that strike fear into the heart of procrastinators everywhere, especially me…..CHRISTMAS IS TWO WEEKS AWAY!
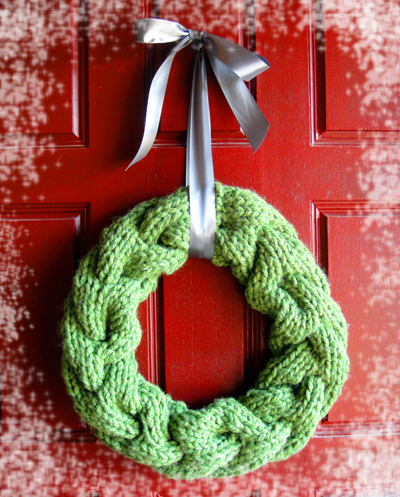
Never fear fellow slackers. I whipped up this super festive cabled wreath in no time. Hung on my front door, it greets visitors with such holiday dazzle they overlook the fact that the rest of my house is a ‘work in progress’.
This super chunky horseshoe cable is surprisingly simple and knits up fast on size 17 needles. Here’s how I did it…step by step.
Yarn: 2 skeins of super bulky yarn – this one is Lion Brand Wool-Ease Thick and Quick but any super bulky will work. About 108 yards per skein
Size 17 straight needles and one large (size 11-17) double pointed needle needle for the cables.
Tapestry needle
Sewing needle and green thread
12″ boxed wire wreath form
The wreath construction is basically a short scarf seamed together at the ends. The horseshoe cable is a simple 8 row pattern repeat. If you’ve never knit cables before, just remember: be patient and don’t worry if if feels like you’re stretching the stitches too far or there are weird holes when you complete the cable row. Just wait until you’ve finished a few repeats of the pattern and it will start making sense. Ready to go?
With yarn held doubled, cast on 16 stitches.
Start the horseshoe cable pattern:
Repeat this cable pattern a total of 12 times – you can do fewer for a smaller wreath or add more for a larger circumference. My gauge came out to about 1 inch per cable so 12 repeats fit nicely on a 12 inch wreath form.
Confused by the cable row? – here’s the step by step photos of how I did it:
 Slip the first 4 stitches onto a double pointed needle. This is my favorite cabling trick because unlike cable needles, you can knit these stitches straight from the double points instead of trying to push them back onto the left needle. It makes a big difference with these super bulky cables.
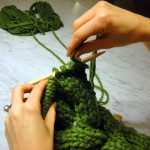 With the first 4 stitches on the double pointed needle, hold the needle to the back, bring the working yarn in front of those stitches and use your straight needle to knit the first 4 stitches on the left needle.
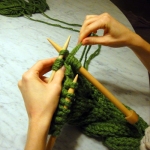 Now you’ll knit the 4 stitches you had on the back double pointed needle (DPN). Make sure the back needle hasn’t twisted, and push the 4 stitches on the right needle as far down to the tip as possible. Now starting with the far right stitch on the DPN, knit the 4 stitches you’ve been holding in the back.
See, that wasn’t so bad. You’re halfway there!
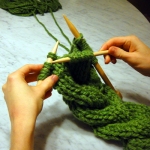 There should be 8 stitches remaining on the left needle.
Using the DPN, pick up the next 4 remaining stitches and hold them to the front.
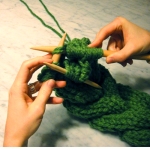 Knit the four stitches remaining on the left needle.
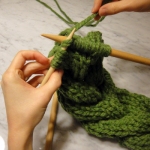 And finally, squish all your stitches down to the end of the right needle and knit the 4 stitches you’ve been holding to the front on the DPN.
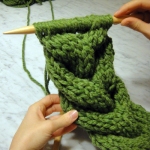 Here’s what it should look like when you finish the cable row. Like I said, it will feel a little strange to have those stitches pulled as taut they are, but as you knit the next 6 rows they will loosen up and start to look right.
.
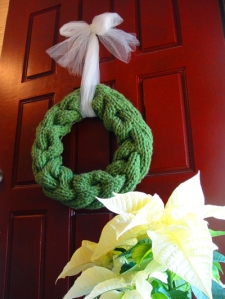 Repeat the horseshoe cable 11 more times then bind off. The wreath can be a little tricky to seam considering you’re in the middle of a thick cable, but don’t worry if it doesn’t look perfect – you can always put a bow there.
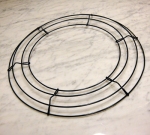 Once you’ve seamed it into a wreath. Use a needle and sewing thread (yarn is too bulky to hide the stitches) to attach the wreath to a wire form.
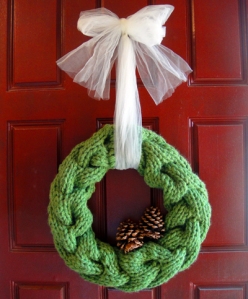
Add a bow and your front door will be ready for everything the holidays can throw at it. Get creative and try adding red felted balls for berries or adding pine cone for some texture. Now sit back with a nice cup of hot cider and enjoy your creative prowess. Happy Holidays!


 Where I'm at
 Beach Bum Bag
 Garter Snake Purse
 Head to Headband
 Holy Cowl!
 Holy Cuffs
 Organic Mushrom
 Racing Stripes
 Silk Bandana Scarf
 The Eco Hero
 The Kiwi Slouch
 The Micro Scarf
 The Weekender
Lorene
/ December 13, 2011This is such an adorable idea. I am hoping I have some TnQ in my stash to try your pattern. Thanks for sharing.
prisca
/ October 16, 2012Lovely knits!! Nice blog!! Please contact me as I didn’t find your e-mail address. I am an editor in Kotoliving -lifestylemagazine from Finland…
Jen
/ October 26, 2013Thanks for a great pattern! I used a square frame and a bunch of autumn colored yarn from my stash to make a gorgeous one!